SeARch HeRE

Showing posts with label art process. Show all posts

Art Process no.2 - Zemotion photo

Alright art process no.2. I took Zemotion's photo as my prey huhu. So, let's take a look.

Process 1: As usual, trace using Illustrator CS3 or Photoshop CS3. And then colour the base color which is basic colors


Process 2: Yes, I know th eyelashes was a bit hard to make by using mouse. So the tips is, download eyelashes brush at deviantart.com :)


Process 4: You need 2 change setting of your brush. Click brush, click right at smoothing and other dynamic option, the at click dynamic changed it 2 fade effect. Then, now coloured the eyebrow.

Process 5: My favourite is the lips. make the details, then erased the artlines.


Process 6: Coloured the hair black. All black.


Process 7: Then, add the hairlines. Detail the area that you want.

Process 8: Then, coloured some black to black blue, as the second hairlines.


Process 8: It should be like this. yes we almost finish.


Final Image:


As I can said: You need to practice more because colouring with mouse is 10 times harder than using tablet.

Digital Art Process (without tablet) - Aoi the GazettE

This is the process how I coloured artwork in Photoshop CS3. Most people doing this using tablet like wacom, kanvus light and so on. But, this can be done by using mouse since I'm using mouse not a tablet. So, from here you can see the whole process:


Process 1: First step: I trace the line using Adobe illustrator CS3. You can do Photoshop CS3 as well or just scan the line you made by hand. Alrite, after you're done with artwork, first you colour the artwork with basic colours including put the first shadow. I started with face first. I'm usually do hair at last. You can see in this pic:
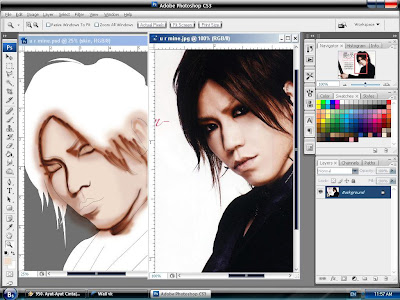


Process 2: Then I'll start with eyes. It's not same like the original one but it's okay since it's a first try.


Process 3: Here you will detail the face and also coloured the lips. You can erased the previous artline you made at his lips and also nose.


Process 4: After that, I coloured the hair with black and adding first highlight with brown at his hair. as you can see, one layer for his hair, one layer for his face. basically it's 3 basic layers you need to done this process. Then, I use small brush 1 pixel and done the hairline. Finish with it, I copy the hairline and arranged it while playing with layer option and you will different colours of his hairlines.


Process 5: Then I erased some of coloured in the area I don't want.


Process 6: To make it hair look realistic, you need hair brush, as you can see the hair will look smooth.


The 7 process: Then you will finish the clothes:


The final image:


Since doing with mouse taking time, you should practice always and it's challenging more than using tablet.
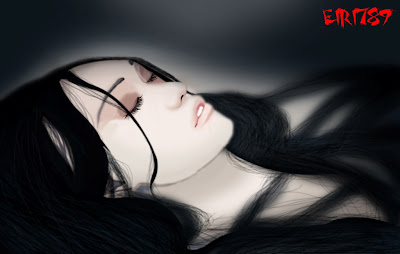
When you can't close your eyes


yesterday couldn't sleep, so this is what happened huhuh

FreeLance PhotoGraphic Designer

My name is Ain Aznan and I am a freelance photo graphic designer based in Malaysia.

I have been dedicating my time to helping companies and individuals redesign and improve their corporate and portfolio design; making them simpler, clearer, more efficient and professional.

Please browse through my projects here to get a feel of my style and approach in web design.

If I am the right designer for you, please leave comment at my blog comment and I'll reply you about your needs. I enjoy meeting new clients and would love to **collaborate with you.

Good day.